How to Install a Hardwired GPS Tracker
Step-by-step guide to hardwire a vehicle GPS tracker: tools, safe wiring, mounting, testing and activation plus insurance and professional installation options.
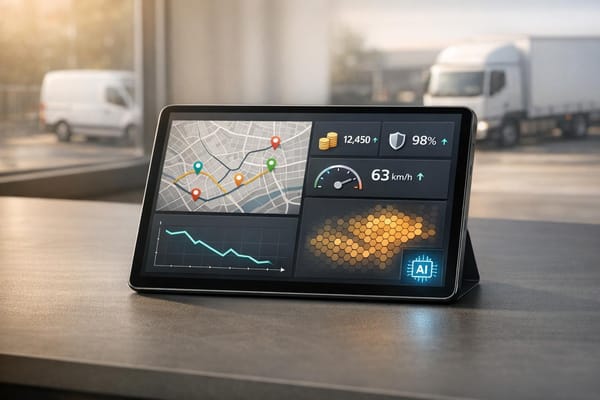
Installing a hardwired GPS tracker ensures your vehicle is monitored without interruptions. These devices connect directly to the car's electrical system, providing constant power and advanced features like remote engine immobilisation and driver alerts. They're discreetly installed, making them harder to tamper with, and are often required by insurers for high-value vehicles. Here's a quick breakdown of the process:
- Tools Needed: Digital multimeter, screwdrivers, wire strippers, electrical tape, zip ties, inline fuse, and vehicle wiring diagrams.
- Key Steps:
- Disconnect the battery for safety.
- Locate constant power, ground, and ignition wires using a multimeter.
- Connect the wires securely (red for power, black for ground, white/yellow for ignition).
- Mount the tracker under the dashboard for clear GPS signals.
- Test connections and activate the tracker on the platform.
For a simpler option, professional installation is available, ensuring compliance with insurance standards and proper functionality. Costs start at £35 for hardware, with subscriptions from £7.99/month. Proper installation improves security, reduces risks, and can even lower insurance premiums by 5–20%.

5-Step Hardwired GPS Tracker Installation Process
How to Install a Hardwired GPS Tracker in a Vehicle | Step-by-Step Tutorial
Tools and Materials You'll Need
Before you begin, make sure you have the right tools and materials on hand to ensure a smooth installation process. One key tool you'll need is a digital multimeter. This is crucial for identifying constant power (11–14V) and ignition wires. Keep in mind that systems with low-voltage data wiring (+8V or lower) won’t be able to power the tracker. As TrackerSystems emphasises:
You MUST use a digital multimeter to identify the proper circuits for power. The GPS device MUST have +12V or higher to operate correctly. Beware that many newer vehicles now have data wiring that operate at +8V or lower which will NOT work.
Once you’ve got your multimeter ready, gather the other basic tools needed for the job.
Basic Tools
You’ll need the following:
- A Phillips head screwdriver
- Wire strippers/cutters
- Electrical tape
- Zip ties
- A ring terminal
- Double-sided tape for mounting
- A 3A inline fuse to protect the power wire
These tools will cover the majority of the installation steps.
Vehicle-Specific Items
In addition to the basic tools, you’ll need a vehicle-specific wiring or fuse box diagram. This will help you locate the ignition and power leads accurately. As PAJ GPS advises:
Make sure to always check your car's wiring diagram if you are unsure of what you are working with.
Most GRS tracker wiring harnesses follow a standard three-wire setup: red for constant power, black for ground, and white or yellow for ignition. This straightforward configuration ensures reliable performance for GRS tracking devices. However, for vehicles with metal-foil-lined dashboards, you might need an external GPS/GSM antenna to ensure the signal can penetrate the metal.
Preparing for Installation
Safety First
Before touching any wires, turn off your vehicle's ignition completely and disconnect the battery. This step isn't optional - it's critical. Working with live electrical systems can lead to short circuits, damage to your tracker, or even personal injury. As Fleet1st advises:
Always prioritise safety when working with electrical systems... Be cautious not to interfere with your vehicle's existing wiring, airbags, or other critical components.
Disconnecting the battery reduces risks significantly. Once the power is off, you can safely access the dashboard and wiring without worrying about accidental sparks or damage. With this precaution in place, you can focus on finding the correct wires for your installation.
Finding the Right Wires
To install the tracker, you'll need to locate three key wires in your vehicle: constant power (red), ground (black), and ignition (white or yellow). These are usually found near the steering column, the ignition switch, or inside the fuse box. However, don't rely on assumptions about wire colours - they can vary between manufacturers. Newer vehicles often use low-voltage data wiring (+8V or less), which isn’t suitable for powering your tracker.
A digital multimeter is your best tool here. Use it to test voltage readings for each wire. Look for a constant power source that registers between +12V and +24V and confirm the ignition wire is live only when the key is in the 'Run' position. Avoid any low-voltage data wires (+8V or less), as they won’t provide enough power. According to LiveViewGPS, the ignition column is the cleanest and most reliable power source for GPS trackers. Steer clear of using the radio as a power source - it’s inconsistent and unreliable for this purpose.
Reading the Tracker Manual
Take the time to read the GRS tracker manual thoroughly. It contains vital information, including voltage compatibility and specific wire colour codes for your device. Most trackers are designed to operate within a 12V-24V DC range, but as Azuga highlights:
The device MUST NOT be installed in vehicles with a battery source greater than 24V DC.
The manual also explains how to interpret the LED status indicators, which are crucial for verifying a successful installation. These indicators use different blink patterns to signal whether the device is powered correctly or if there’s a connection issue. Spending ten minutes reviewing the manual now can save you hours of troubleshooting later on.
Installation Instructions
Wiring Power and Ignition
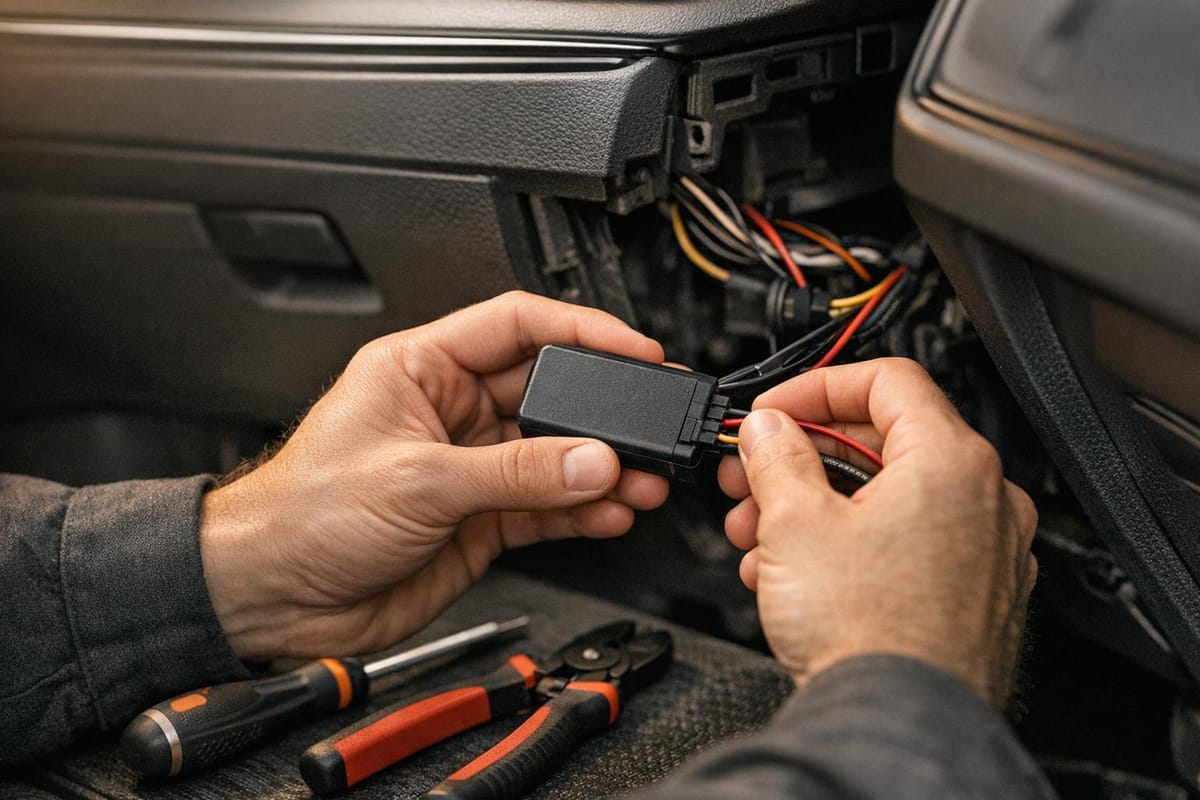
To get started, connect the red wire to a constant 12V–24V power source, ensuring you include a 3A inline fuse for protection. Next, attach the white or yellow wire to a switched ignition source. The ignition column is the most dependable place for this connection. To confirm you're working with the correct ignition wire, test its voltage - it should measure between +12V and +24V when the ignition is on and drop to zero when it's off.
For the connection itself, use the 'poke and wrap' method: strip the wire, insert it into the connection point, and secure it firmly with tape. This method ensures a solid connection. Avoid loose or flimsy taps, as they can vibrate loose over time, causing potential issues.
Connecting the Ground Wire
The black ground wire is essential for completing the electrical circuit. It must be connected to a solid metal chassis ground point or the battery's negative terminal. Before securing the ground, use a multimeter to confirm that your chosen grounding point consistently reads 0 volts, regardless of whether the ignition is on or off.
For the best results, select a clean, unpainted metal surface on the chassis. This ensures a stable connection, which is vital for the GPS tracker to function correctly and safely. Avoid attaching the ground wire to plastic surfaces or moving parts, as these won't provide the stability needed. Once you've secured the ground wire, you're ready to move on to mounting the tracker.
Mounting the Tracker
Position the tracker high under the dashboard, ideally at the base of the windscreen, to ensure it has a clear path for GPS signal reception. The antenna side - usually marked with a barcode or label - should face upwards, directed toward the sky. Avoid mounting the tracker under the bonnet, as this will obstruct the GPS signal.
To secure the device, use two zip ties threaded through its mounting points, attaching it to either a wiring bundle or a sturdy bracket. Make sure the tracker is at least 15 centimetres away from other electronic devices to minimise interference. Once mounted, check the LED status lights to confirm the tracker has successfully connected to both GPS and cellular networks before reassembling the dashboard.
Testing and Activation
Checking Your Connections
Start by turning on the ignition. All the LED lights on your tracker should blink once. If the green LED stays lit for five seconds, your installation is good to go. However, if the red LED blinks every two seconds, something's off. In that case, double-check that the black ground wire is securely attached to a clean metal chassis point with a 0-volt reading.
Make sure the vehicle is parked outdoors with a clear view of the sky. Testing indoors often fails because GPS signals struggle to get through walls or metal roofs. After powering up the tracker, give it 5–10 minutes to connect to satellites and stabilise. During this time, the LED lights should settle into their normal operating pattern.
Once you've confirmed the connections and the signals are stable, you can move on to configuring your tracker on the GRS platform.
Setting Up the GRS Platform
Log in to the GRS Fleet Telematics portal and locate your tracker using its 10-digit serial number, which you'll find on the barcode. Assign a clear and practical name, like "Parts Van" or "Delivery 3", to make it easier to manage multiple vehicles. Be sure to fill in all the required fields (marked with an asterisk); otherwise, the system won't save your input.
When the vehicle appears on your dashboard, test the geofencing feature by creating a virtual boundary with a 50-metre radius around your location. This lets you check that alerts work properly when the vehicle crosses the boundary. Also, confirm that the platform accurately shows the ignition status - displaying "engine-on" when running and "engine-off" when parked.
After completing these steps, take the vehicle out for a short test drive to validate the setup.
Test Drive
With the tracker fully configured on the GRS platform, take the vehicle for a quick drive in an area with reliable mobile coverage. On a 4G network, you should see location updates within 10 seconds. Keep an eye on the map to ensure the vehicle's position updates roughly every 60 seconds and matches your actual route.
If you've set up a geofence, drive beyond the boundary to confirm that alerts are sent to your mobile app or email. This quick test ensures both the GPS signal and the cellular connection are functioning correctly before the vehicle returns to regular use.
Common Installation Mistakes to Avoid
Mistakes and Solutions
Even seasoned professionals can make errors that affect a GPS tracker's performance. One common issue is placing the tracker under metal surfaces, such as the bonnet or steering column. This placement blocks GPS signals entirely. As LiveViewGPS explains:
The GPS signal will penetrate glass, plastic, foam, fibreglass, and wood, but will not penetrate metal (so never put it under the hood of a car or truck).
The solution? Install the tracker under the plastic dashboard, ensuring it has a clear view of the sky through the windscreen.
Wiring mistakes are another frequent problem. For reliable operation, connect the red wire to a constant 12V/24V power source and the white wire to an ignition-controlled circuit. Avoid tapping into low-voltage data wires, as many modern vehicles use wiring that operates at just 8V or lower - this won't provide enough power for most trackers. Always use a digital multimeter to confirm you're connecting to a proper 12V+ power source.
Grounding issues can lead to power failures. The black wire must be attached to a clean, unpainted metal bolt on the vehicle chassis. Grounding to plastic trim or painted surfaces won't complete the circuit properly. Before connecting, use a multimeter to verify the grounding point reads 0 volts.
Here's a quick summary of common mistakes and their solutions:
| Common Mistake | Consequence | Correct Installation Method |
|---|---|---|
| Placing tracker under the bonnet or metal dash | Loss of GPS signal | Mount under the plastic dashboard with a clear view of the sky through the windscreen |
| Connecting Red and White wires to constant power | Incorrect ignition detection | Connect Red to constant 12V/24V and White to a circuit active only in the "RUN" position |
| Tapping into 8V data wires | Device failure or intermittent operation | Use a multimeter to locate a dedicated 12V+ power source |
| Grounding to plastic or painted surfaces | Power failure due to incomplete circuit | Attach the ground (black) wire to a clean, bare metal bolt on the vehicle chassis |
| Using the radio as a power source | Electrical noise and signal feedback | Take power directly from the ignition column for the cleanest signal |
Lastly, insecure mounting can cause vibrations and lead to disconnections over time. To avoid this, secure all wiring with zip ties, keeping them at least 15 centimetres away from moving parts like pedals or the steering column. For the most durable connections, solder the wires instead of relying solely on crimps or tape.
Professional Installation Option
If the idea of tackling wiring diagrams and fiddling with multimeters feels overwhelming, there's an easier route: professional installation. GRS Fleet Telematics offers a mobile fitting service across the UK, where a qualified technician can install your tracker at your business location without disrupting your daily operations. The process is quick too - installation typically takes just 30 to 40 minutes per vehicle and includes all the necessary documentation to meet insurance requirements.
One major advantage of professional installation is the added security it provides. Expert technicians discreetly hide the main hardwired unit behind the dashboard or in the engine compartment. They also install a secondary hidden Bluetooth backup tracker, creating a dual-tracker system. This ensures uninterrupted monitoring, even if someone tampers with the primary device.
Certified installation also helps with insurance compliance. Many UK insurers require Thatcham-approved trackers with professional installation for policyholders to qualify for premium discounts, which can range from 5% to 20%. Professional installers handle all the necessary paperwork and configure the system to meet these insurance standards.
The cost of professional installation is £145, but it’s waived if you combine it with fleet branding services through GRS Fleet Graphics. Hardware costs vary depending on the package you choose, starting at £35 for the Essential tier and going up to £99 for the Ultimate package, which includes a remote immobilisation feature. A £7.99 monthly subscription covers the SIM card, data, and platform access. This seamless setup allows you to focus on managing your fleet without worrying about technical hiccups.
Technicians don’t just install the system - they also ensure everything is functioning perfectly. They test all connections, verify GPS signal strength, and provide training for your fleet managers on how to use the dashboard and alert systems. This hands-on support helps you skip the trial-and-error phase that often comes with self-installation.
Conclusion
Installing a hardwired GPS tracker may seem daunting at first, but with the right tools, careful planning, and attention to detail, it’s a task that can be tackled effectively. Once installed, the advantages become clear: discreet placement behind the dashboard, continuous monitoring, and advanced features like remote immobilisation.
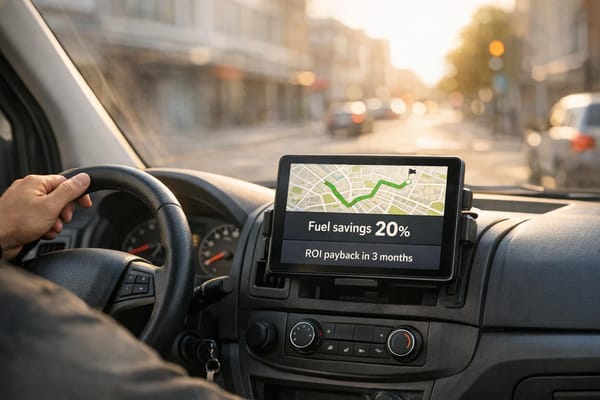
For businesses in the UK, the benefits extend well beyond mere tracking. Real-time data enables smarter route choices, reduces idling, and improves fuel efficiency - potentially cutting fuel costs by up to 15% and maintenance expenses by 20%. The constant power supply ensures uninterrupted monitoring, helping companies meet DVSA safety standards and boost overall operational efficiency. These savings, combined with regulatory and insurance benefits, make hardwired systems a valuable investment.
In fact, many UK insurers require Thatcham-certified trackers with professional installation to qualify for premium discounts, which can range between 5% and 20% annually. With over 70% of UK fleet operators expected to adopt GPS tracking by 2025, businesses that install these systems position themselves as industry leaders focused on both security and efficiency.
GRS Fleet Telematics provides tailored solutions, from basic tracking to advanced dual-tracker setups with remote immobilisation. With a 91% recovery rate for stolen vehicles, a professionally installed system offers peace of mind and robust protection.
Take the time to verify every connection carefully, and don’t hesitate to seek professional help if necessary. A properly installed hardwired tracker will not only enhance security but also deliver long-term savings and operational benefits for your fleet.
FAQs
Why choose professional installation for a hardwired GPS tracker instead of DIY?
When you go for professional installation of a hardwired GPS tracker, you're investing in a setup that's secure, dependable, and resistant to tampering. An experienced installer connects the tracker directly to your vehicle's electrical system, ensuring it has a constant power source. This eliminates common issues like signal dropouts or battery failures that can arise with DIY setups. Plus, they stick to the manufacturer's instructions, so the device works perfectly and stays within warranty terms.
In the UK, many insurance companies and fleet policies insist on professional installation if you want to qualify for premium discounts. Installers also know how to position the tracker for the best GPS accuracy, avoiding signal interference while keeping it discreet to deter theft. Though the initial cost of professional installation - about £145 - might seem steep, it often pays for itself through lower insurance premiums, better theft recovery chances, and peace of mind knowing your system is built to last as long as your vehicle does.
How do I check if a hardwired GPS tracker is compatible with my vehicle's electrical system?
To make sure your vehicle and tracker work together smoothly, check that the tracker’s voltage requirements match your vehicle’s electrical system. Most vehicles in the UK use a 12 V DC battery, so your tracker should either support 12 V DC or offer a range like 12–24 V DC. This range is particularly useful for higher-voltage systems found in some lorries or electric-assisted vehicles. You can use a multimeter to confirm your vehicle’s battery voltage and identify a constant power source - a wire that remains live even when the ignition is off. This is where you’ll connect the tracker’s positive (red) and negative (black) wires.
Pay attention to the fuse rating at the connection point. A fuse rated between 5 A and 10 A is generally sufficient to protect both your tracker and the vehicle’s electrical system. When routing the wiring, avoid placing it near high-current cables or electronic components like radios, as this could lead to interference. Additionally, ensure the tracker has a sturdy enclosure, such as one with an IP67 rating, to withstand various conditions. For a secure and discreet installation, consider positioning the tracker under the dashboard or behind the glovebox. These steps will help ensure a seamless and reliable integration of the tracker with your vehicle’s electrical system.
What cost savings and insurance benefits can a hardwired GPS tracker provide?
Installing a hardwired GPS tracker can help businesses save money in multiple ways. For starters, it can cut fleet fuel consumption by up to 15%, thanks to improved driving efficiency. On top of that, it can lower maintenance expenses by around 20%, as it encourages better vehicle care and proactive upkeep.
Another big win? Insurance companies often acknowledge the added security provided by these devices - especially Thatcham-approved trackers - and may offer premium discounts of up to 20%. With these combined benefits, GPS trackers prove to be a smart investment for enhancing fleet management and protecting vehicles.